 |
| |
Part 7: Making Windows
First thing we will need to name a window is a glass texture. We will be using TGAglass_interior.rsb as the glass texuture. I converted the rsb to a bmp so we can see the texture in 3dsmax (rsb's cannot be read by that program)
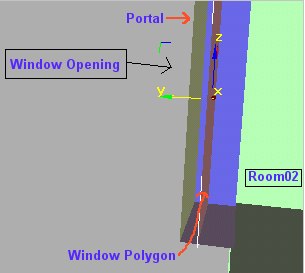
Lets begin by making two window openings in the second floor room.. Use boolean and remember to make a the portals. (Include the window frame in the top room, not the outside)
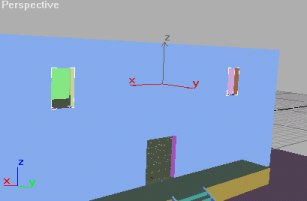
To make the window polygon, just don't delete anything from the boolean box after you make your boolean in the wall. Then use one of the polygons as the portal and one as the glass (move the glass polygon in the middle of the window frame).
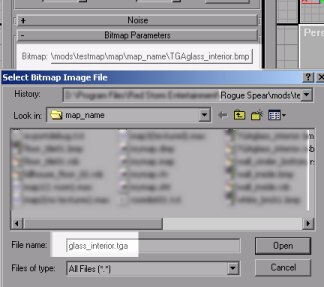
Now, open material editor and click on an empty sphere. Move up in the menu until you see a checkbox called '2 sided'.
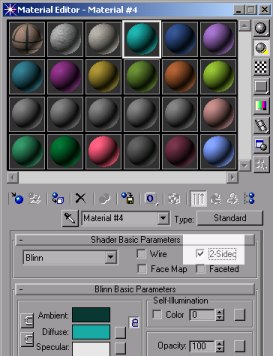
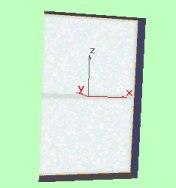
Check that and then move down to the 'diffuse color' checkbox. Check that also and then click the 'none' next to it. Choose bitmap and find the texture TGAglass_interior.bmp. Texture the glass polygon with it and give it a UVW map. The glass polygon window looks like this:
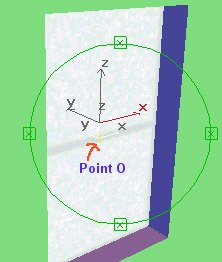
Now we have to add a helper point in the middle of the glass (Make sure it is in the glass polygon in x, y, and z directions)
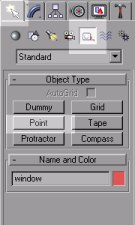
Name the point O (upper case o, not zero). The helper point should be located right around where it is in the image below.
Now select your glass polygon and the point O and group them as 'glassout1_02' (format: glassname_room#)
To make the second window, just clone the group 'glassout1_02'. Move it to the other window opening and ungroup it. Inside the group you will find the point 'O', but it was renamed to 'O01'. We want the point to have the name 'O', so delete the '01' at the end. Now group the cloned glass polygon and the point O as 'glassout2_02'
Now you should have two window groups. The last thing to do it to rename the texture in the material editor. We want the window to be translucent (see-through). This is done using an alpha channel inside the rsb file. In order for the game to know that we want it to use the alphachannel, the texture file has to be named TGAname.rsb, but the map file has to point to the file name.tga. So open the material editor, and click on the sphere with our glass texture. Click on the button with the path, and in the 'Open window', just type the new name 'glass_interior.rsb'.
This file does not exist (and 3dsmax cannot read rsb's), so the texture will disappear from the 3d model. However, it only that name that matters.
The windows are now finished. Remember do not group the windows with any room, but group everything else (also not including portals) into their appropriate room group (_01, _02, _03, and _04) The roomlist looks like this now:
room 01 levels 1.0 end end
room 02 levels 2.0 end end
room 03 levels 1.0 2.0 end end
room 04 levels 1.0 end end
Part 8: Making a Door
Doors are a but tricky in Rogue Spear. They are probably the hardest part of mapping. They require many tags and are hard to clone. You now should know how to make rooms and a doorway between them. A door is only a box with a helper point and with some tagging. I am not going to explain all the steps to make a door because the plugins already came with a good door tutorial. It can be found on page 4 of TUTORIAL1.HLP. Read it and you can put the door anywhere you like.
The door I made looks like this:
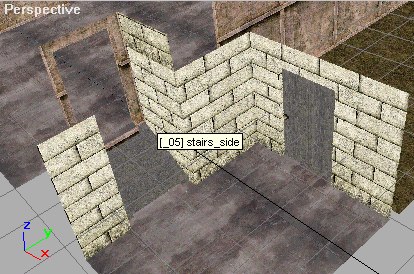
The door is on the side of the house. First I added a new section to room 01 and then I built another small room on the side of room 01. Then I made a doorways connecting the small room (_05) with _01 and _05 with _04. The door is between the small room and the outside.
Part 9: Texturing
Texturing is the last thing I did. Most of the textures I used are from City Street Large. The final map looks something like this:
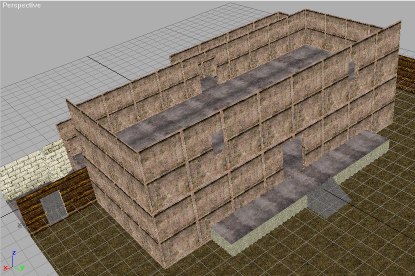
You can open the file twolevel2(textured).max and export the finished map.
(end)
|
|
|
|
|
|