 |
| |
Tutorial - Making a map for Rogue Spear - Part 5
3d Studio Max (cont)
Exporting
Roomlist.txt
The moment has come and you are ready to export the map. We will be exporting to the directory 'mod_name\map\map_name\'
Inside that folder is a file called roomlist01.txt (Open it using notepad and look at it). This has the list of all the rooms in the map and some properties for each room. The format of each line in the file is as follows: (red color indicates variable value and (Tab)/(Return) indicate the formatting.)
Room 01 (Tab) levels x y (Tab) end (Tab) "attribute" end (Return)
Levels defines the level(s) the room will show up in the planning map and the attribute is the response of the R6 team when entering the room. So for example, if the attribute is "clearable", it a small room, so the R6 team will stop for a second and look around. On the other hand, if its attribute is "too large", the team will not even stop because it is probably a large open area.
So an example of a roomlist file may look like this:
Room 01 levels 1.0 end end
Room 02 levels 2.0 3.0 end "too large" end
Room 301 levels 1.0 3.0 -1.0 end "clearable" end
In the example, the map has 3 rooms. Room 1 will show up on level 1 of the planning map and it is a pretty large room, so there is no attribute. Room 2 will be on levels 2 and 3 and it is a very large open space. Room 301 will be on levels 1, 3, and -1, and it is pretty small.
Read more about it in the help files. Right now for our map there should be 2 rooms in the roomlist file and remember that there has to be an return after the last line of the roomlist file (The last character in the file is a return, so go after the word 'end' at the end of the line for room 02 and press enter)
room 01 levels 1.0 end "clearable" end
room 02 levels 1.0 end "clearable" end
(Return)
Back to 3dsmax
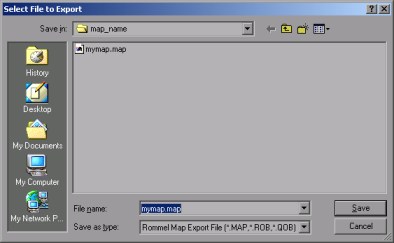
Ok, now in 3d Studio max. Press File -> Export. Go to mod_name\map\map_name\. As the file type select
Rommel Map Export. Name the map my_map.map for example (make sure you write the .map) . Press Save. If it asks to overwrite, press ok.
A new window should show up that looks like this:
Look in the help files to see what each thing does. Use the setup I have. The CXP File should point to '...Rogue Spear\data\texture\rommel.cxp'. Press Export.
This is the result. And when you press Ok, it should say 'Scene successfully exported'
You are done with the geometry and can close 3d Studio Max.
Lighting
You use the Lightmaker located in RSE_level_plugins\Lighting Tool\. The program crashes easily, so do not right click in the black area, except when a light it selected.
Open Lightmaker. From File press Set Map. Go to your map's dir (mod_name\map\map_name\) and select the map. Now File -> Set Texture Directory. Once again go to mod_name\map\map_name\ and choose any texture there. Press Start. The program will now convert all BMPs into RSBs. You can move around using arrows, run using SHIFT, pan using CTRL, and move up/down using PageUp/PageDown. First set the ambient light for the map (lights the whole map with this light) Lights->Edit Ambient Light.
Next add some lights. Double Click inside a room and a menu should show up. (A light can only light up a room that it is in) Choose 'Point (Linear Attenuation) for the light and choose some color. Press Ok.
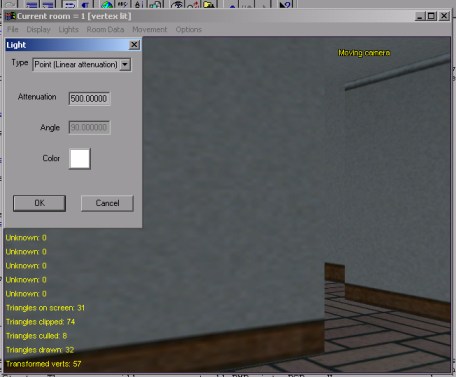
and a light sphere should show up. Select the sphere and press 'l' (lowercase L) to go into light edit mode (you can move the light) and use + or - to change the attenuation (how far it goes) Note: Lighting in RS is based on vertices (vertex) if the light attenuation does not reach a vertex that polygon will not be light.
Example:
Add more light where ever you want them, just remember that because RS supports a really high GAMMA Brightness, most of the lighting will show up the same, So the ambient light really decides how well the individual light will look like.
When finished, click on File -> Save Lighting Solution. Go to your map's dir (mod_name\map\map_name\) and save the lighting as my_map.dmp (map name and dmp file type)
Exit the Lightmaker.
Making Binaries with UOeditor
Now you will need to build some files for the map to actually run in the game. (collision detection, etc...) Go to your Rogue Spear directory and right click on UOeditor.exe. Click Create Shortcut. Right click on the newly created Shortcut and choose properties. At the end of the target text box type:
...Rogue Spear\UOEditor.exe'' -buildbinary
Remember the space after the quote ('') and before -buildbinary.
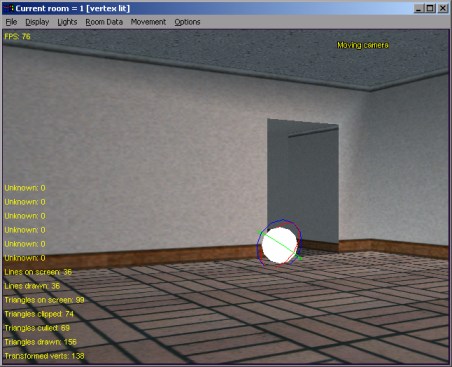
Double Click on the shortcut and let RS or UOeditor load. Click on File->Open map. Find the map you made (exported) and open it. (You might have to click it twice if the open file window reopens). While the map is loading, it is building the files. You can go into your map's folder and look for the two new files named mapname.rlv and mapname.sht. If everything went well, it should look like this:
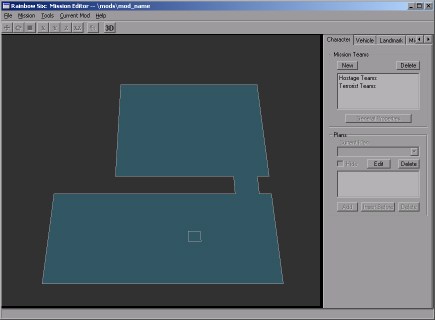
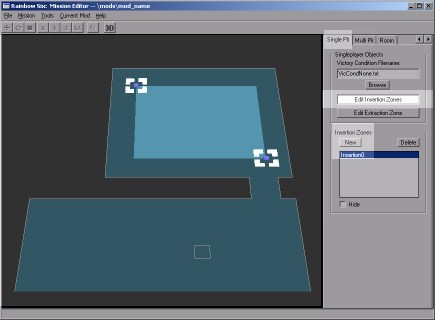
Now you will need to make a mission file for a terrorist hunt/multiplayer. Press File->Mew Mission. It will ask you to name it. Name it Two_Room. A window should show up, just check 'Is adversarial mission'. Now click on the 'Rendering Tab'. Check the checkbox 'Skybox On' and press Browse. Go to Rogue Spear\data\model\ and choose a file name that starts with a 'sky' (I chose sky_dusk_snow_mountains.qob) Press OK. Go to 'Single Plr' Tab and press 'edit insertions zones'. Press New and 'draw' the base on the map.
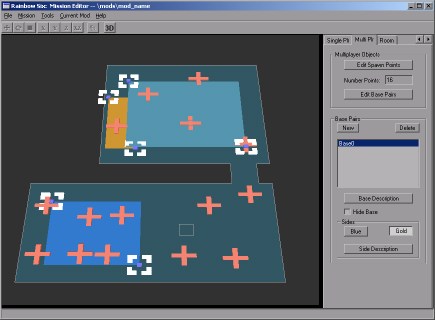
Now click on 'Multi Plr' Tab and click edit spawn points. 'Draw' red 16 crosses on the map (these are survival insertions)
Now click on 'Edit Base Pairs' Press New. Press 'Base Description' Type 'Two Rooms' (this shows up in mp games when the host chooses insertions). Now Press Blue and draw the base on the map. Press Side Description and type 'Room 1'. Now Press Gold. Draw the base and press Side Description. Type 'Room 2'.
Now go to File and Save As. Save the mission in mod_name\mission\ as 'my_mis.mis'.
You can also do special room sound options (for example, you can set a room as a hallway, so when a bullet is fired, it will give a little echo) This done by clicking the 'Room' Tab. Selecting a room, checking 'EAX on' and choosing the type.
You are done with the UOeditor, so exit.
Part 6 >>>
|
|
|
|
|
|