 |
| |
Tutorial - Making a Mod Installer
|
Program
|
File
Name
|
Download
|
Instructions
|
|
Click
Team: Install Maker
|
Latest
Version (about 2408kb)
|
Click
Team web site
|
Download
and Install the program on your computer. I used the normal
version, Not Pro.
|
| Example
Directories |
exdirs.zip |
exdirs.zip |
Download
and Install somewhere on your computer. Make sure in WinZip you do not click on the file Mod Contents because it will not install all the necessary directories. Just open the zip and click extract. Chose some temporary directory, like c:\download\installmod\ |
1. Information
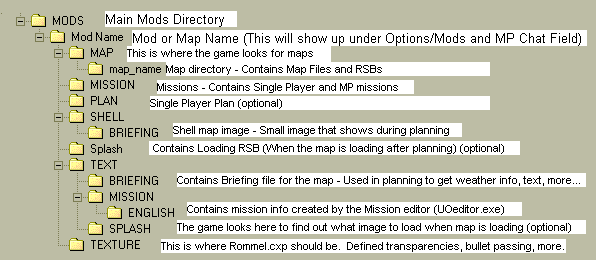
1. This is how the directories should be set up. Move all your mod files to the directory. The best way to see how everything works, download the "Italy: Training Facility" map in the Files section.
Things to Know:
"Mod Name" Directory will become the name of the mod in Options/mods and the name will show up in the MP chat location if the mod is initialized
The Splash image (image that shows up when the map is loading after planning) works like this. In Text\Splash\ you need to name the files as the name of your map located in MAP\map_name\ (if your file name is my_map.map, the splash file should be named my_map.spl) Also, you need to have a splash screen file named as the name of the mission. (if this is confusing, just look at the files in the Italy map)
2. Install Program
(Note: You may have a different version of the program, because mine is a bit old)
1. Start install Maker. A wizard window should show up. If it does not, press File-> New. Click Next.
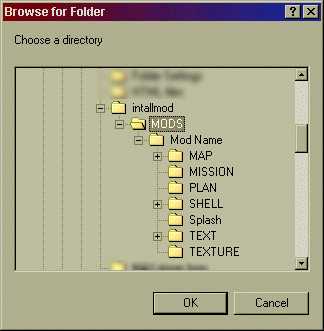
2. Select Include sub-directories. Click on Browse to add the files. Find the directory where you unzipped the example directories and select "MODS" (The name of your mod). The reason why you have to select MODS, and not "mod_name" is because later on, when the install program will look for the user's RS directory, it will not know that it has to install to Rogue Spear\mods\mod_name\, but instead choose Rogue Spear\mod_name\.
3. Next you will choose the language. English is default. Also choose a name that will show up in the install program title bar. The name of your mod is a good choice. You can click the Preview button to see what it looks like. (from now on, if you see Preview, you can use it to see how its coming along) Click Next in the wizard.
4. Next it will ask you to make a shortcut. Skip this part and choose Next.
5. Now it will ask you to enter a read me. If you do not have one, at least write the name of the mod and some info about it (description, web site, e-mail) Also write to the user a note that he should install to his Rogue Spear directory, not Mods. When done click next.
6. Choose the Small or Full Screen Mods. Enter the name of the mod again. This will be the name that shows up in large font. Click Next
7. Now it will ask you to add an image file that will show up in the install program. You can make one in a Paint program and name it as a bmp. Make sure that it is the right dimensions.
Also, you can change the background blue. I recommend you stay away from this. Click Next.
8. Now it will ask you to add a default directory. Use:
C:\Program Files\Red Storm Entertainment\Rogue Spear
To make the install program automatically find the directory of Rogue Spear, click on Registry Base and enter the following info:
ROOT KEY: H_KEY_LOCAL_MACHINE
KEY: Software\Red Storm Entertainment\Rogue Spear
SUBKEY: InstallationPath

Click OK and then Next.
9. Now it will ask you if you want to show a read me after the install. I would leave this alone because no one reads them here any way. It will also ask to run a program and you skip this also. Press Next.
10. Uncheck Uninstall program
11. Now you are ready to build the install program, so press Finish. (I am usually not finished here because I want to do more fine tunning.
After the Wizard
After the wizard, if you want to fine tune or rebuild the install program, you can do this.
Fine tunning:
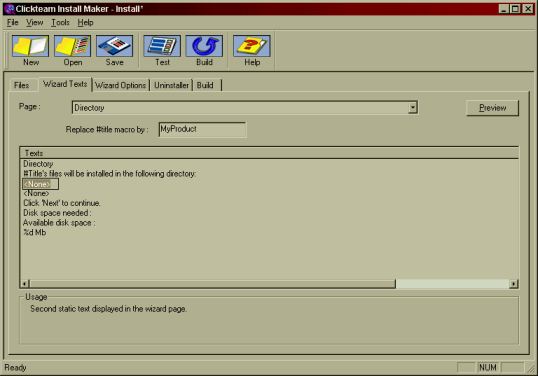
I like to tell the user when he is picking the directory to install, that he should install to his rogue spear directory and not mods. So in the install program (without wizard) Click on the Wizard Texts tab and choose the Directory Page. Now where it says , double click on that and write
Install to your Rogue Spear directory, Not mods
Or something like this. Click Preview to see what it looks like.
Rebuilding
1. Click on the Build Tab. Click on the Build Button and make a new file name or overwrite the old install program.
(end)
|
|
|
|
|
|