Tutorial #2 - Conversion Time Line
(You may stop at any point, depending on where you want to get)
Half Life (Counter-Strike) *.BSP -> World Craft *.MAP -> Quake 3 *.BSP
->VRML *.WRL
What you need to know/have:
Remember, you will not need all of these depending what step you will go up to.
-A fairly good knowledge of computers. For example how to use windows explorer/rename
files.
-The free programs World Craft (v 1.6 or 3.3), QRadiant v202, QBuild.
Download the needed Files:
|
Program
|
File
Name
|
Download
|
Instructions
|
|
World
Craft
|
Version
3.33 worldcraft3.exe
or
Version 1.6 (Shareware)
wc16shar.exe
|
Version
3.33
Version
1.6
|
Install
either one. When you first run it, it will ask to set it up.
You basically only have to set up the textures. To do this go to
Options (preferences) -> Textures tab and add any wad file (or
download one from the internet) This is because the program wants
at least some textures.
|
|
Converters:
q3bsptool
WinBSPc |
Conversion2.zip |
Conversion2.zip |
Open
the zip file and Unzip the whole file to a directory. You must
extract the while zip file because it will create the appropriate
directories. |
|
Q3Radiant |
Q3Radiant202Setup.zip
|
qeradiant.com
|
Install
this to the "quake iii arena" folder that was created by
Conversion2.zip. When it asks you to find the game folder, go to
Conversion2\quake iii arena\
|
|
QBuild |
q3build109_min.exe |
Green
Eggs |
Install
this anywhere you want to. The conversion2 folder is a good
choice. |
Step 1: Half Life BSP (type of map file)
1. Find a Half Life BSP (for example the smallest polygon count Counter-Strike
map: cs_assault)
2. Make a new folder somewhere on your hard drive that is the name of your
map. Copy and paste the original BSP into the folder. Inside the folder, make
a new sub folder q3.
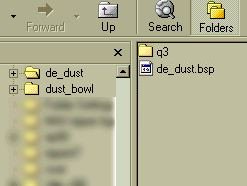
3. Open winbspc.exe. Choose File->Convert. Find the previously created folder
and open the BSP file copied there. A small window should show up. Choose MAP
and check “best matching texturing” and “no liquid” (I am
still not sure if these help the process, so you can go without them). Click
on Browse to choose the output folder. Select the folder where your BSP file
is (not q3)
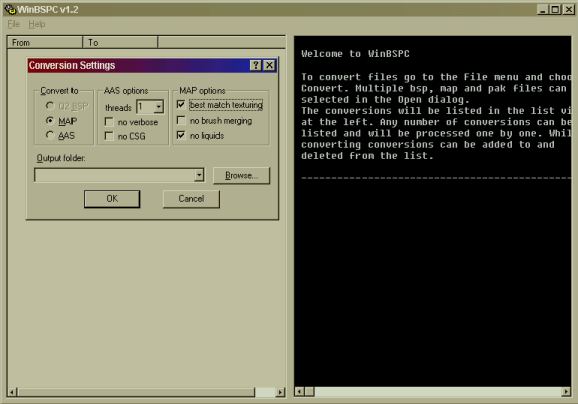
4. Click OK and let the map convert.
Step 2: World Craft Map
Skip this step and go on to Step 3, come back here if you get errors in step
3.
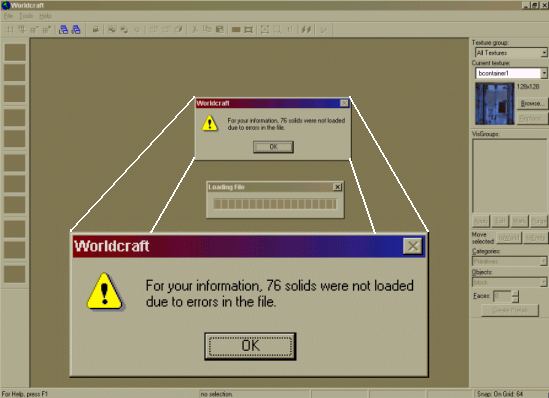
1. Now, you should be able to open the map is World Craft. Open World Craft
(v1.6 and v3.3 works for me, I am assuming that you know how to set it up. Be
sure to add some textures in the setup screen) Open the *.map file from your
directory. It should load and at the end you will probably get an error message
that says ## solids could not be opened due to errors.
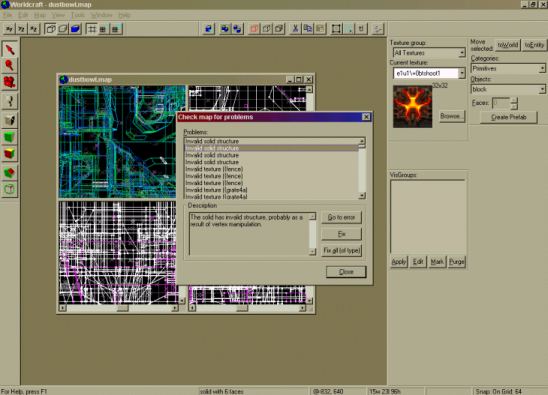
2. Now choose MAP->Check For Problems. Click on a Problem and Choose Fix
all (of type) (this means that you will have to click fix all on every type
of problem, for example texture, solid, etc.) Close the window and choose MAP->Check
for Problems. It should say “No Problems Found”. If it did find more
problems just choose Fix all again and repeat the step until no problems are
found. If after several tires it does not work, save the map and reopen it.
Then try again. (I am not sure if this helps with the process also)
3. Now choose FILE->export to MAP. Name the map name_of_map_fix.map and
export it to your directory.
Step 3: Convert the map to a Quake 3 BSP
1. Begin by coping the map file you just created to the directory "Conversion2\Quake
iii Arena\BASEQ3\MAPS\". This is where the next program we will use looks
for map files to convert.
2. You should have QRadiant and Qbuild installed by now. Open Qbuild.exe. If
a window opens to setup the directories, choose the "Quake iii Arena"
folder located in "\Conversions2" as the game directory, and look
for q3map.exe and bspc.exe in the folder "Quake iii Arena\Tools\".
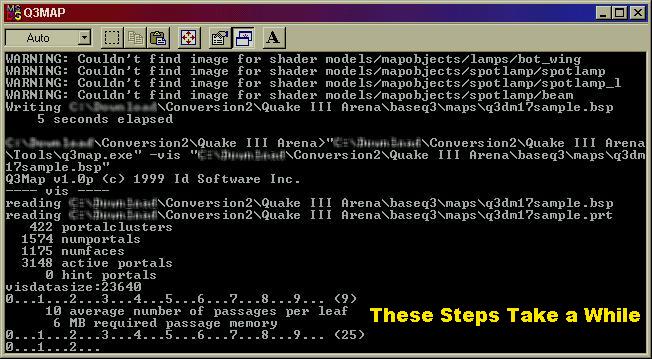
3. A new window should open that looks like this:
Your map should be in the list, if its not be sure to do step 3.1. Select your
map from the list. These are the options I used. For Lights I used None and
I unchecked "Run Q3 after Build". Press Build. You will have to wait
a little while (a few minutes) depending on the size of the map and your computer.
Step 4: Quake 3 BSP to VRML
1. Go to your "Conversion2\Quake iii Arena\BASEQ3\MAPS\" directory
and copy the file "your_map_name.bsp". Now go to your q3bsptool directory
and paste the file there.
There are 2 options here: use a shortcut or use a BAT (batch) file. I personally
like a BAT file more, but a shortcut is easier for most people to use. If you
want to learn how to make either for future knowledge, read the tutorial here.
(The tutorial also helps with the next lines on Shortcut and BAT)
Shortcut: Right-Click on "Shortcut to q3bsp.exe" and choose properties.
Change "map_name_here" in the target text box to your map's name (remember
not to add ".bsp"). After changing the name, Press OK.
OR
BAT: Right Click on the BAT file "convertmap.bat" and choose edit
(if edit is not in the menu, open the file using notepad). Change "map_name_here"
to your map's name (remember not to add ".bsp"). After changing the
name, Save and Quit.
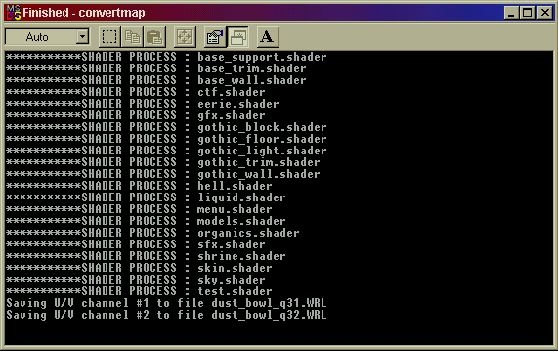
2. Now double click on the Shortcut or the Bat file to run the convert. It
should take a couple of seconds. In the directory you should see a lot of “dummy”
bmp textures (a quake 3 bsp stores the textures in the BSP file, so if you converted
an original Q3 BSP you would have real textures. Try the test.bsp included in
the folder to see it for your self.) Also 2 WRL files should show up. I am not
sure what the difference between them is, but the first one has a slightly larger
file size.
Step 6: Opening in 3d Studio Max
If you got up to this step without major problems, congratulations!
1. Open 3d Studio Max. Choose FILE->Import. Choose VRML in the file type
and find the q3bsptool directory and open the first WRL file of your map. A
window with 3 options should show up.
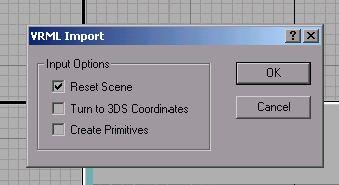
I only chose Reset Scene. I know that 3ds coordinates will put the map on the
y-axis (not what we want) and I am not sure what Create Primitives does.
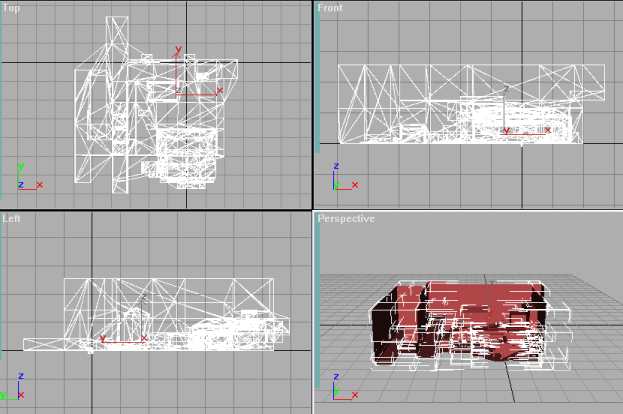
2. The map should load and look something like this.
3. Now Open the object list  and highlight all the objects
named “item##” and “vsep01”. You can delete them.
and highlight all the objects
named “item##” and “vsep01”. You can delete them.
If you notice, by clicking on the center on object button  ,
they are all just a small box in one spot of the map. These were probably the
objects like weapons, special tagging, etc.
,
they are all just a small box in one spot of the map. These were probably the
objects like weapons, special tagging, etc.
4. It may look like there are so many triangles are in the map, but that is
because normally you would not see your map this way. Save the file as *.max
file.
This is what I would do right now, but you may develop different methods
Now the hard part is to explode all necessary polygons and then regrouping
them into logical parts, like walls of building, floor, roof, etc. Then you
texture them. Tag the floors, and resize (if you know by what factor to resize
it), and then export.
If in the game the geometry looks too big/small just use the resize button
 to resize it. (I heard 300% bigger works)
That is basically it; you might have to do other things like delete/add/modify
the geometry to fit the new engine's requirements.
(end)