 |
| |
Part 4: Connecting the First and Second Floor Rooms
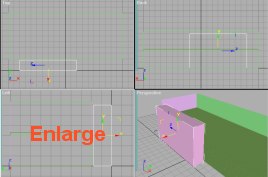
We will want to connect the two rooms using stairs (or a ramp if desired). Lets create a separate room that will connect the two rooms and contain the stairs. So begin by creating the stairs room next to the two rooms. (look at the images below)
In Top View, using the box tool, create a rectangle that is 20 cm from the side of the rooms (and about 200 cm wide, 1000 long, and about as high as both of the rooms). Name the new box 'Room_stairs_01' and flip the normals.
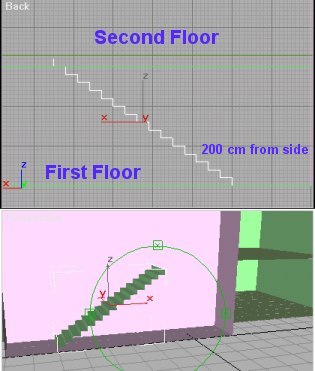
Now lets make the actuall stairs in the stairs room. Using the line tool, in the front (or side view) create a 'zigzag' going up from the first floor to the second floor (rise 20 cm and go 30 cm deep). Start the stairs zipzag about 200 cm from the side of the room to leave space for the doorway that will go there. If you do not reach the second floor using this pattern (2 up, 3 to the side), just go as high as you can, but not above the second floor. Even if you 'mess up' during the process, you will later be able to fix it using edit mesh. However, before pressing edit mesh, press 'extrude'. Type 180 and press enter. This will make the stairs be 3d. Name the zigzag stairs 'stairs_polygons'.

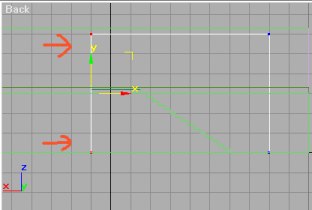
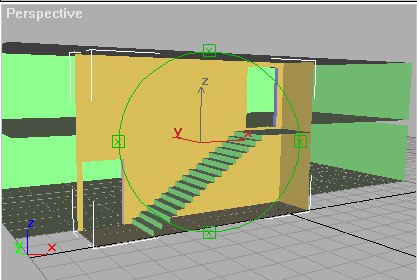
Now you can fix anything you might have messed up. You will probably have to move the stairs in the Top View so they are actually in the right place (3d view). The final result looks like this:
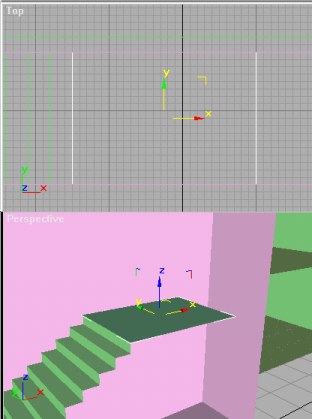
As you can see I did not reach the second floor and I had 10 cm left on the top. This is no problem. Now lets make the floor that will be on top of the stairs. In the Top View, use the line tool to draw a rectangle where the floor should be (look at the image below). Name it 'stairs_floor', give it a normal. Move the polygon up to where the top of the stairs ends:
As you can see the stairs room is a bit too wide, so use edit mesh (by vertex) and change the width of the room.
Now all that is left is to boolean out door openings in both of the rooms and create portals between the rooms. I will skip this part because I expect you to know this from the past tutorial.
Ok, fine, here are the steps to do this:
Boolean
1. Make a box where the doorway will be.
2. Click on one of the walls where the doorway will be placed (the box you just created should be touching this wall)
3. Click on the create tab, choose compound objects from the pulldown menu, and press Boolean.
4. Select the copy radio button and click Pick Operand B.
5. Either click on the doorway box in Perspectibe View or choose it from the Object View menu.
6. Click on another tab (like modify) to close the boolean window. You made a hole in one of the walls, so do the same to the other side (repeat step 1-6 for the other wall)
7. Now click on the doorway box, name it something like 'doorwayR01_R02_01'. Flip its normals. Explode (with the name 'doorwayR01_R02_') Select the floor and tag it as 'floorface'.
8. Now you have to create the portal, luckely you have two polygons aleady among the doorwayR01_R02's that can serve this purpose. If you want to include the doorway in a room, delete the doorway polygon that is inside the room and the other doorway polygon will be our portal. Keep the polygon that is between the two rooms and acts as the 'portal' between the two rooms.
9. Rename the remaining doorway polygon as p01_02 (Format: pRoomNormalIsFacing_OtherRoom)
The finished work looks like this:
Now make sure that you tagged all the floors, stairs, and door opening floors as 'floorface'. Group the stairs room as '_03' and you can export the map right now and test it out. (textures are not needed, but adding lights in the lightmaker is a must because everything will look white) The room list looks like this:
room 01 levels 1.0 end end
room 02 levels 2.0 end end
room 03 levels 1.0 2.0 end end
Page 4 >>>
|
|
|
|
|
|