 |
| |
Tutorial - Making a map for Rogue Spear - Part 3
3d Studio Max (cont)
Hallway
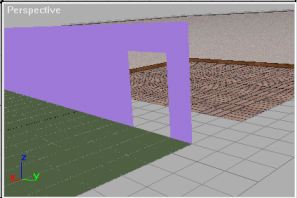
1. Once again use the box tool to make a box connecting both of the rooms. Look at the picture below and make the size of the hallway 300 cm in height and larger on both sides.
So, in the 3d view it looks like this:
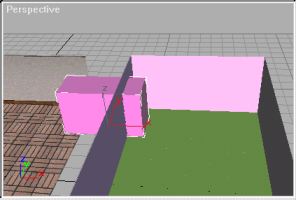
Name the new box 'r01_r02hallway'
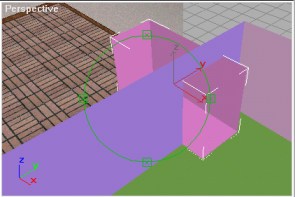
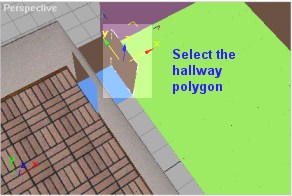
2. We will have to make a hole in the walls of room 01 and room 02, so there is passage between them. This is done using the boolean tool. First select the wall in room 02 that touches the hallway.
Now Press the Create Tab -> Geometry Icon -> Compound Objects (pull down menu) -> Boolean Button. Select the Copy radio button. Now you are ready to make the hole.
Press 'Pick Operand B' and then pick the hallway. You can do this by either clicking on the hallway in 3d view or by clicking on it in the Object View window. Now to exit the boolean window after a boolean operation, I usually just click the Modify tab and then Create tab.
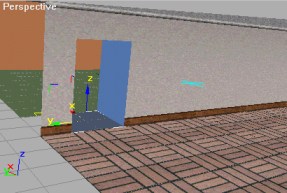
This is what boolean does (the hallway is hidden to show what it does) Remember Hiding? = Select hallway, Edit -> Properties, Check hide. Press Ok. Then press 5 and select it to unhide.
Now click on Object View, and select the 6 objects of room 02.
Press Select. Go to the Group Menu and press group. For the group name type '_02'. Now in the Object View there should be 3 things, _01, _02 and r01_r02hallway.
The next step is to make that hole in room 01. Do this by selecting _01 and pressing ungroup from the group menu. Go to Object View and notice the objects of room 01. Press the wall of room 01 that touches the hallway. Boolean out the hole in that wall also. Remember Boolean? = Boolean. Copy. Pick Operand B. Select Hallway.
Ok, so now there should be a hole in the room 01 and 02. Select the objects of room 01 and group them as '_01'. Now you are back to the 3 objects in Object View. (_01, _02 and r01_r02hallway)
Select r01_r02hallway. Press Modify Tab. Flip the normals. Remember Normal? = Press Normal and check 'flip the normals' of the hallway.
Ok, with the hallway still selected, from the modify tab, press edit mesh.
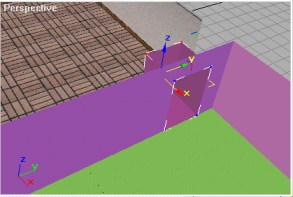
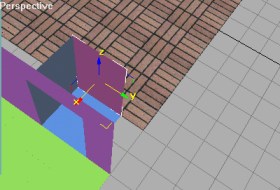
You should notice the vertices of the hallway turned into little blue squares. From the top view, select the vertices on one side of the room. (you are selecting 4 vertices = side of cube)
When you select the vertices, they turn red and you can move them. Move the vertices so they are even with the wall of the room.
Do the same for the second side. When you are finished, it should look like this:
Note: Normally, there is no need to make the hallway 'stick' out in each room and then to boolean. This was only to clarify boolean. You can make the hallway box touch the walls of the rooms and it will perform the same boolean action.
Tagging the Hallway
Now remember, just because to us the hallway, is just a hallway, to the computer, its a room, so it must be tagged like a room.
Select r01_r02hallway. Rename it to 'r01_r02hallway_01'. Press Edit Mesh and Explode. Name the exploded Object 'r01_r02hallway_'. So now you have 6 objects r01_r02hallway_01 - r01_r02hallway_06.
Select the floor and add an F at the end of its name. Tag it as a floorface. Remember floorface? Edit -> Properties -> User Defined Tab. Type floorface and Press Ok.
The next decision is whether or not to make the hallway a separate room. (The game uses this info for AI and other things.) Because the hallway we made is so small (only 200 cm long), we can make it a part of room 02. So the first thing to do it to delete the hallway wall between room 02 and the hallway. Select that wall and press delete.
Now you have a clear passage when looking from room 01 to 02 (not the other way around)
What about the other side of the hallway? Well good question. The RS engine is a portal engine, meaning that it will only render geometry that is in the room you are standing in and what can be seen through a portal. So, think of it as you looking though a window and only seeing part of the room inside, not all of it. This way less polygons are rendered, which equals better performance. (Note: This is a very low tech way of doing things and is not used by hi tech newer games like UT, HL, Q3)
So that hallway wall will become the portal. Click on that hallway wall and rename it p02_01
The format of a portal is this:
pNameOfRoomPortalPolygonFaces_OtherRoom
So this is very simple, first p, then you look at which side the polygon faces (remember Normal?) and then the other room. So, the portal in our case faces room 02 and goes to room 01, so its p02_01. Note: A portal has to be right in between the two rooms and cannot be grouped with any rooms. It does not need a texture and is not rendered.
Ok, it's time for texturing.
Part 4 >>>
|
|
|
|
|
|